Rubrics are a grid-based evaluation system that allows for more accurate assessment of pre-defined categories, associated with one or multiple point values. They can be added to any Discussion Board or Assignment type assessment. The first step to adding a Rubric to Blackboard is to first design your rubric and identify the parameters.
Generally, rubrics consist of a grid. On the left axis, rubrics will contain one or more criteria that will be measured against the assignment submission. On the upper axis, rubrics will contain one or more Levels of Achievement. These can be expressed numerically (as point values), as a range of point values, or as a percentage.
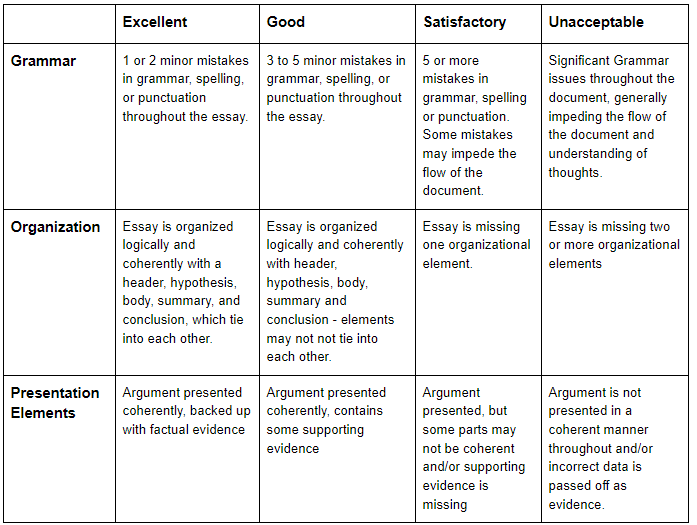
Here is what a sample rubric looks like:
What we will need to do when adding this to Blackboard is determine a value associated with each Level of Achievement. This will be set in the Rubric Creation mechanism on Blackboard.
Creating The Rubric On Blackboard
 |
Log into your Blackboard course, expand the Control Panel and click Course Tools > Rubrics. |
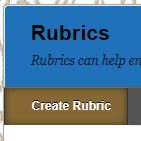 |
Next, click Create Rubric at the top left and enter the name of your rubric (description is optional). |
 |
In the next area, you will see the grid layout. By default, it is by Percentage; the 3 levels of achievement are Novice, Competent, and Proficient, and the 3 criteria are Formatting, Organization and Grammar.
To add additional Criteria, click the Add Row button at the upper left, and to add additional Levels of Achievement, click the Add Column button at the upper left.
Once the necessary parts are added, click Rubric Type to determine the type.
If you use Points/Point ranges, the rubric scores will automatically scale to the total of the assignment associated with the rubric. (For example, if your rubric has 4 criteria, and the best value is 5 points (and the maximum grade on the rubric is 20), when you're using it to grade an assignment that's worth 100 points, you'll notice that the criteria will proportionally scale, making the best value 25 for, so that all 4 criteria scale to the 100 points for the assignment.)
|
 |
Now that we have added columns and rows for our Criteria and Levels of Achievement, we can add in the headers. Click the chevron (grey arrow) next to any of the headers in the Criteria /Levels of Achievement to change the name to what you want this to be based on your rubric. |
 |
Now, we can add in the descriptive text from our saved rubric. Click on the rubric boxes and type or paste in the text associated with that cell. |
 |
Next, we will put in the points associated with meeting each criteria at that level of achievement. Since we have 4 Levels, in this example, Excellent will be worth 3 points, Good will be worth 2, Satisfactory will be worth 1, and Unacceptable will be worth 0. Note that the Total Points reflects the highest possible score. |
 |
Click Submit to save the rubric. You can view and edit the rubric if needed, but the Levels of Achievement and Criteria cannot be modified once the rubric has been used for grading.
If you would like to copy a rubric from one course to another, you can click the Export button, and it will download to your computer. Then, go to this same location in the destination course and click Import Rubric and select the file you exported in this step.
|
Associating The Rubric With An Assignment/Discussion
 |
Once your rubric has been created, you can apply it to an assignment or discussion board in your course. Start by opening an assignment or discussion board in your Blackboard course, or creating a new one. |
 |
Scroll down to the Grading area, click the button that says Add Rubric, and select the rubric that you created.
You will be asked if you want to set the rubric's maximum points as the points total for the assignment - this is optional:
- If you say n", the rubric's points will scale to meet the assignment's points.
- If you say yes, the number of points in the assignment will be changed to reflect the maximum number of points in the rubric.
|
 |
Set the option to determine if the rubric should be visible to students, and if so, when you'd like it to be available to them. Other options can be left as default. Click the Submit button on the assignment or discussion board to save the changes once you're done. |